### Essential Guide to Heat Press Design Placement and Sizing for DTF Transfers
In the world of Direct-to-Film (DTF) transfers, achieving a high-quality and professional-looking final product relies on two crucial factors: precise design placement and appropriate sizing. Whether you're customizing t-shirts, caps, baby onesies, or tote bags, understanding optimal positioning and dimensions ensures a polished and visually appealing result. For DTF business owners, mastering these elements enhances brand consistency and improves customer satisfaction. Enthusiasts and hobbyists will also benefit from learning these techniques to elevate the quality of their personalized creations.
This comprehensive guide explores the key considerations and best practices for effective heat press design placement and sizing across various apparel items. Whether you're a seasoned professional or just starting in the DTF printing industry, these insights will help you produce outstanding results consistently.
### The Importance of Accurate Design Placement
Accurate design placement is essential in creating a professional finish. Poorly positioned transfers can make the final product look unbalanced and unappealing, potentially harming a business’s reputation. Conversely, precisely placed designs enhance the overall aesthetic, demonstrating attention to detail and a commitment to quality. For personal projects, correct placement ensures a polished look, making the apparel item more enjoyable to wear and showcase.
### Popular Heat Transfer Design Placements for T-Shirts
Understanding placement options is the first step toward achieving a professional appearance. Below are common placements and recommended sizes for DTF transfers:
#### **Sleeve Placement & Sizing**
- Ideal for adding logos or small designs.
- Position: 1-2 inches below the shoulder seam and centered on the sleeve.
- Typical size: 3-4 inches in width or height.
#### **Back Placement & Sizing**
- Perfect for larger statement designs.
- High back placement (near the collar) or low back placement (closer to the waist) can be used depending on the design.
- Typical size: 10-13 inches in width or height.
#### **Left/Right Chest Placement & Sizing**
- Commonly used for logos or branding elements.
- Position: 7-9 inches down from the shoulder seam and 3-5 inches in from the center.
- Typical size: 3-4 inches in width or height.
#### **Center Chest Placement & Sizing**
- A classic and versatile choice for various designs.
- Position: 3-4 inches below the collar seam, centered horizontally.
- Typical size: 5-10 inches in width or height.
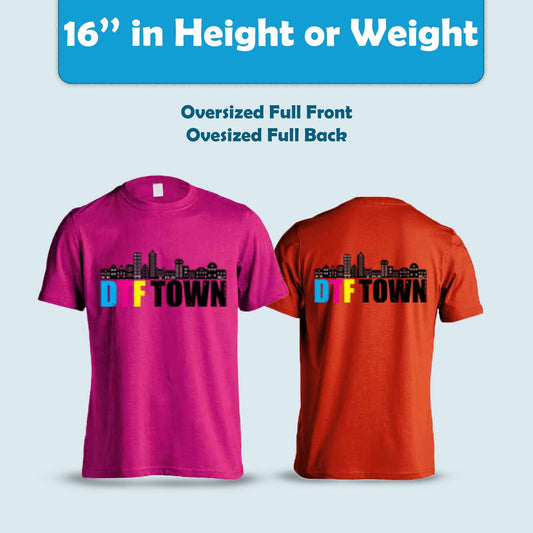
#### **Full Front Placement & Sizing**
- Ideal for bold statement pieces or intricate designs.
- Position: Centered on the front of the t-shirt.
- Typical size: 11-13 inches in width or height.
### **Other Apparel Placement Guidelines**
#### **Baseball Caps**
- **Front Placement:** 3-4 inches in width or height, centered on the front panel.
- **Side Placement:** 1-2 inches in width or height, positioned on the side panel.
#### **Baby Onesies**
- **Front Placement:** 3-5 inches in width, centered on the chest.
- **Back Placement:** 2-3 inches in width, placed on the upper back.
#### **Tote Bags**
- **Front/Back Placement:** 7-9 inches in width, centered on the bag’s panel for a balanced look.
### **Factors Affecting Design Placement**
Choosing the right placement depends on several factors:
- **T-Shirt Size and Style:** Placement may require slight adjustments for different sizes to maintain balance. For example, a design positioned correctly on a small t-shirt might appear too high or too low on an XL t-shirt.
- **Design Size and Shape:** Larger designs are best centered, while smaller ones can be placed more flexibly. The orientation (portrait or landscape) also plays a role in placement.
- **Target Audience and Design Style:** The positioning should align with the intended aesthetic. A youthful design might benefit from higher placement, whereas formal designs typically require centered placement for a professional look.
### **Techniques for Precise Heat Press Design Placement**
#### **The "3 Finger Rule" (Quick Guide for Full-Front Placement)**
- A simple way to estimate ideal placement is by placing three fingers below the collar seam. The top of the design should align with the bottom of the fourth finger.
#### **Using Shirt Seams for Centering**
- Identify the vertical center by drawing an imaginary line from the collar seam down the shirt.
- Find the armpit seams and create a horizontal imaginary line. The intersection of these lines marks the center point for design placement.
#### **Using Rulers and Templates**
- Rulers and pre-made alignment guides help achieve consistent placement across multiple shirts.
- Templates made from transparent film can also be useful for precise positioning.
#### **Heat Transfer Alignment Tools**
- Specialized tools such as grid rulers and laser pointers assist in accurate alignment.
### **Additional Tips for Best Results**
- **Mockup Tools:** Use design software or online mockups to visualize how the placement will look on different apparel items before pressing.
- **Test Pressing on Scrap Fabric:** Always perform a test press on a similar material to check alignment and heat press settings.
- **Heat Press Platen Size:** Ensure that your design fits within the heat press platen. If it exceeds the platen size, adjustments may be necessary.
### **Conclusion**
Mastering heat press design placement takes practice, but understanding key principles and using alignment techniques will lead to professional results. By carefully considering placement, sizing, and target audience preferences, DTF business owners and hobbyists can consistently produce high-quality transfers that enhance the appeal of their apparel products.